
Adding Azure Key Vault secrets in Azure Pipelines


Azure Key Vault enables us to securely store and manage secrets such as API keys, credentials or certificates. In this article we will see how to add vault secrets (those are required during build/restore processes) in Azure pipelines.
Prerequisites
- An Azure DevOps organization. If you don't have one, you can create one for free (https://learn.microsoft.com/en-us/azure/devops/pipelines/get-started/pipelines-sign-up?view=azure-devops).
- An Azure subscription. Create an Azure account for free (https://azure.microsoft.com/en-us/free/?WT.mc_id=A261C142F) if you don't have one already.
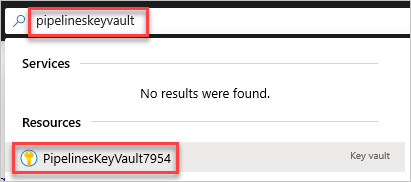
- A key-vault already created say "pipelineskeyvault7954"
Creating a new pipeline and adding key-vault task into it (Here are steps with UI mode without YAML)
- Select Pipelines, and then select New Pipeline.
- Select Use the classic editor to create a pipeline without YAML.
- Select Azure Repos Git, and then select your repository and default branch. Select Continue when you are done.
- Select the .Net Desktop pipeline template.
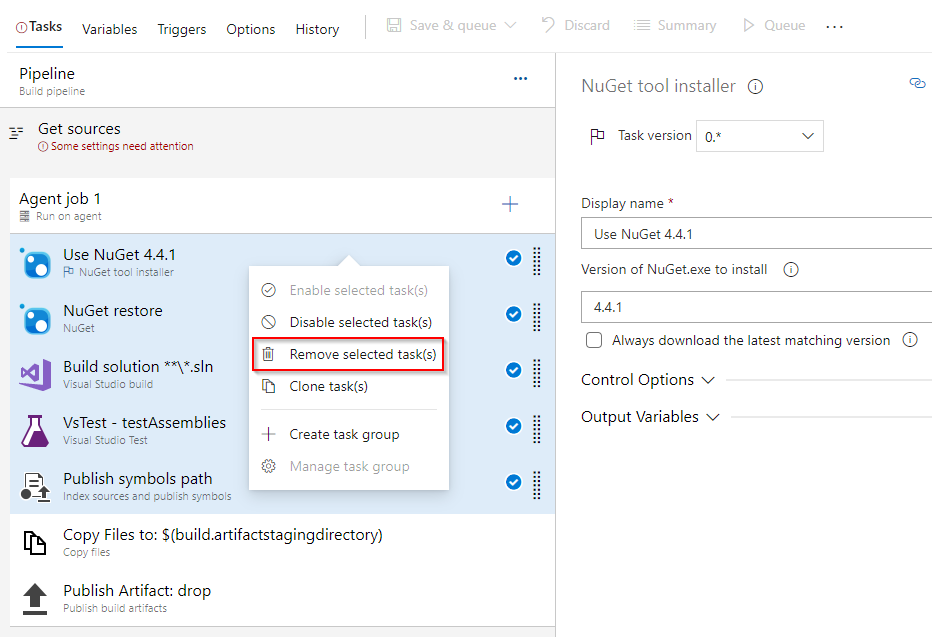
- For key-vault example, we will only need the last two tasks from the template. Press CTRL and then select the first five tasks, right-click and choose Remove selected tasks(s) to delete them.
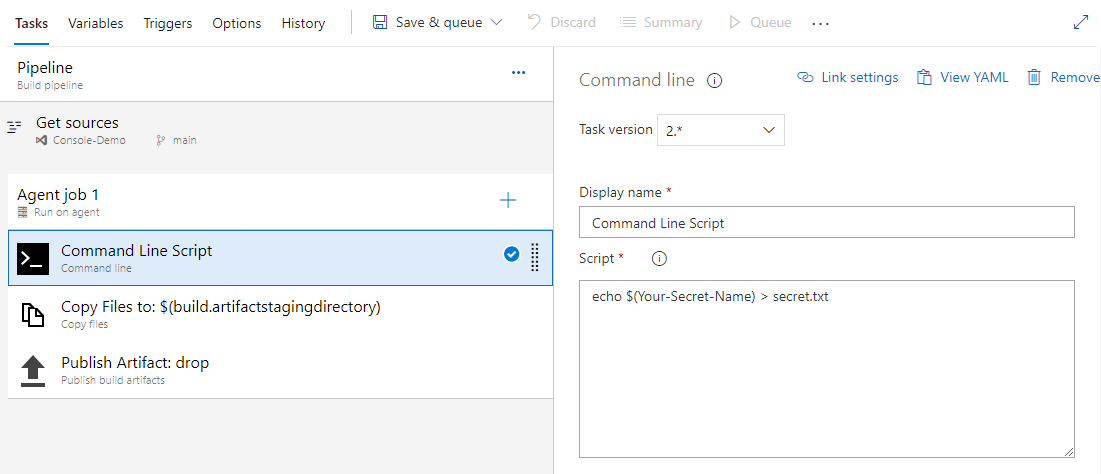
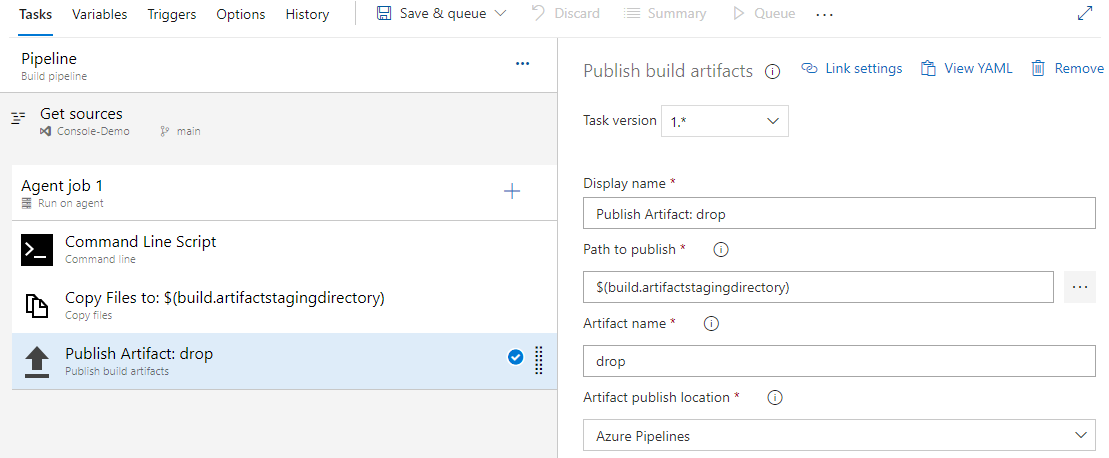
- Select + to add a new task. Add the Command line task and configure it as follows:
- Display name: Command Line Script.
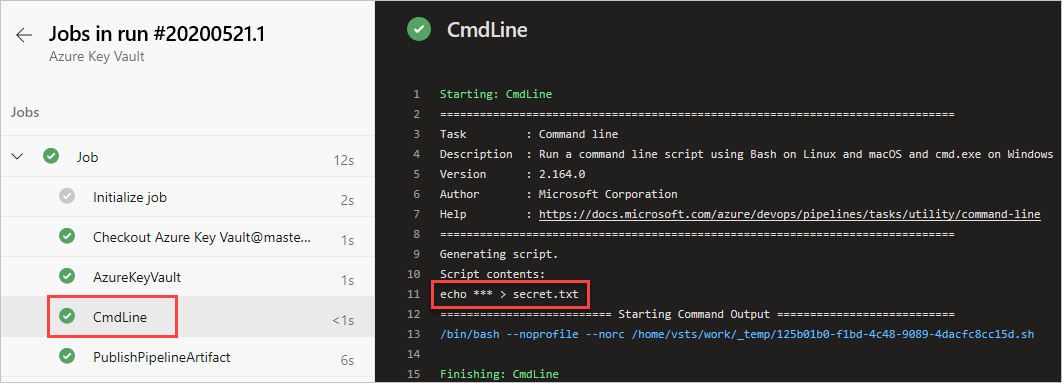
- Script: echo $(Your-Secret-Name) > secret.txt
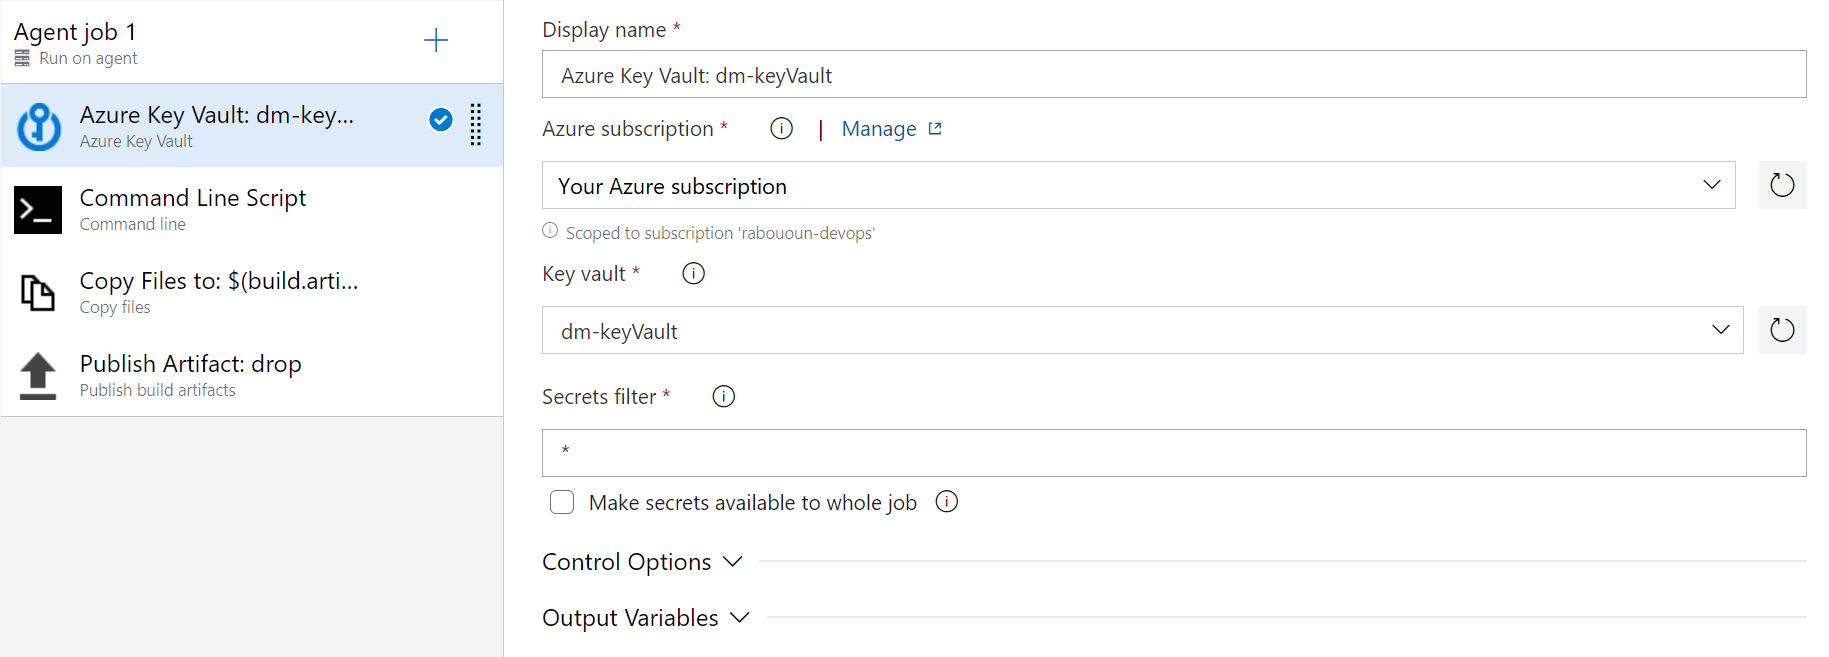
- Select + to add a new task. Add the Azure Key Vault task and configure it as follows:
- Display Name: Azure Key Vault
- Azure subscription: Select your Azure subscription from the list, and then select Authorize.
- Key vault: Select your key vault Secret filter: A comma separated list of secret names or leave * to download all secrets from the selected key
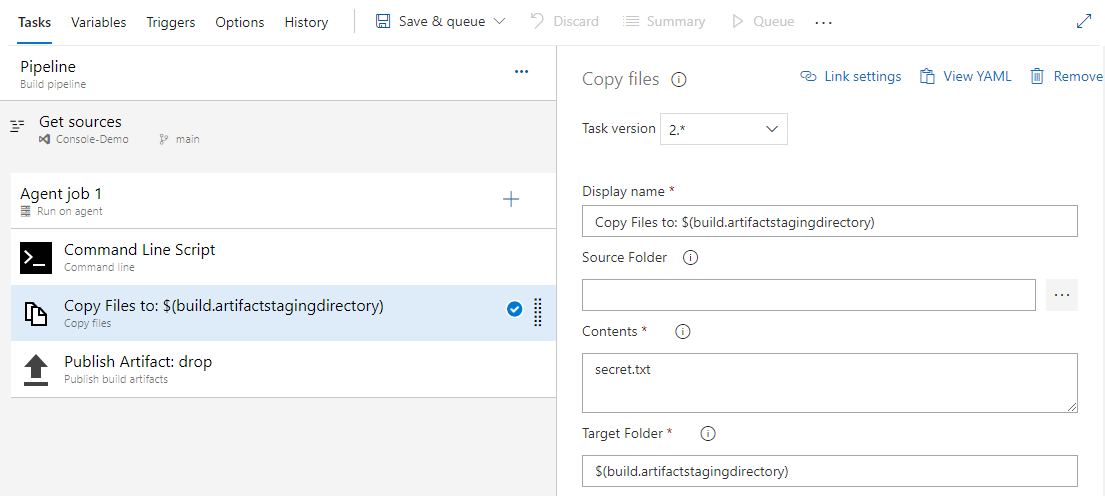
- Select the Copy files task and fill out the required fields.
- Select the Publish Artifacts and keep the default settings.
Note: Don't save or queue your pipeline just yet. We must first give our pipeline the right permissions to access Azure Key Vault. Keep your browser tab open, we will resume the remaining steps once we set up the key vault permissions.
Setting up Azure Key Vault access policies
In order to access our Azure Key Vault in pipeline, we must first set up a service principal to give access to Azure Pipelines.
- Navigate to Azure portal.
- Use the search bar to search for the key vault you created earlier.
- Under Settings Select Access policies.
- Select Add Access Policy to add a new policy.
- For Secret permissions, select Get and List.
- Select the option to select a service principal and search for the one you created in the beginning of this section. A security principal is an object that represents a user, group, service, or application that's requesting access to Azure resources.
- Select Add to create the access policy, then select Save when you are done.
Run and review the pipeline
- Return to the previous tab where we left off.
- Select Save, and then select Save again to commit your changes and trigger the pipeline. You may be asked to allow the pipeline access to Azure resources, if prompted select Allow. You will only have to approve your pipeline once.
- Select the CmdLine task to view the logs.
- Return to pipeline summary and select the published artifact.

- Select the secret.txt artifact to open it.

- The text file should contain our secret: mysecretpassword.

Hey, great!
dev3
22-Apr-2024 at 21:00